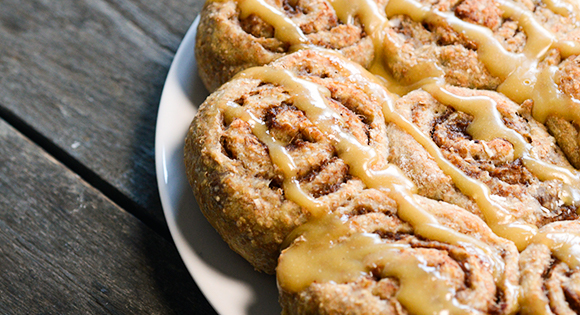
Say hello to a healthier plant-based version of this classic baked treat! A sweet cinnamon-date filling swirled through soft whole wheat buns, topped with a deliciously sticky maple-cashew glaze.
Prep Time: 90 Minutes
Cook Time: 30 Minutes
Yield: Makes 10
Notes:
This is a recipe I've long wanted to create- a healthy, oil-free version of one of my all-time favourite baked treats. These are made using whole wheat flour, so while they're not as light and fluffy as a 'traditional' cinnamon bun, they still have a deliciously soft and chewy texture.
It's important that you don't let the length of this recipe deter you! Cinnamon buns are made with a yeasted bread dough, so there are several steps involved. But once you've got the hang of the whole process, it's really quite straight forward and simple. And trust me- it's totally worth the effort!
There are 3 elements to this recipe: the dough, the cinnamon filling, and the glaze. To make life easier, you can prepare the date puree for the filling ahead of time. Quite often, I'll make a double batch, and freeze it in 2 separate portions so I have it on hand whenever I need it.
It's also important to remember that the consistency of the dough can vary a lot depending on the type of flour you use, or even the humidity level where you live. Make sure you leave it in a warm, dry place to rise- one that's at least 25°C. If the dough seems too wet after the first rise, just stir through a little more flour. The dough should be soft and slightly sticky, but firm enough to roll out.
Note: If you want to make these lower fat, you can skip the glaze, and simply brush the tops of the cinnamon buns with a little maple syrup when you take them out of the oven.
Ingredients:
For the dough:
- 2.5 cups whole wheat flour, plus an extra 1/2 cup (for dusting)
- 1/2 tsp. salt
- 1 cup almond, soy or oat milk
- 1/2 cup unsweetened apple puree
- 7g instant yeast
For the filling:
- 250g pitted fresh dates or 200g pitted dried dates
- 1.5 tbsp. ground cinnamon
- 1 tsp. vanilla extract
For the glaze:
- 3 tbsp. cashew butter (or white almond butter)
- 1.5 tbsp. pure maple syrup
- 2.5 tbsp. plant milk
- 1/2 tsp. vanilla extract
Instructions:
For the dough:
- Combine the flour and salt in a mixing bowl, and stir to combine. Set aside.
- In a separate bowl, combine the plant milk and apple puree. Warm the mixture through, either in a microwave or on the stove, until it reaches approximately 40°C. (If you don’t have a thermometer, test the temp with your finger. 40°C is approximately 'body temp', so it should feel luke-warm but not hot.)
- Sprinkle the yeast over the top of the milk & applesauce mixture, then gently whisk it in. Set aside for 5 minutes.
- Combine the wet ingredients with the dry, and mix until all the ingredients are well combined. You should have a soft, slightly sticky dough. Transfer the dough to a large, clean bowl, and cover with a damp (clean) towel. Leave in a warm, dry place for approximately 1 hour until it has doubled in size. While the dough rises, make the filling and glaze.
For the filling:
- If you are using dried dates, place them in a small saucepan, and cover with water. Bring to a boil, then reduce the heat to medium and simmer for 10 minutes until the dates are soft. Drain the dates but keep the liquid they were cooked in. If you are using fresh dates, just skip this step.
- Place dates in a high-powered blender or food processor, along with 1/3 of a cup of water. (If you used dried dates, use 1/3 cup of the liquid from cooking.) Add the cinnamon and vanilla, and pulse until you have a smooth, uniform paste. You will need to stop the blending or processing several times throughout, in order to scrape dates down from the sides. If needed you can add a little extra liquid, 1-2 tablespoons at a time, to reach the desired consistency.
- Transfer date puree to a bowl or container, and set aside.
For the glaze:
- Combine all ingredients in a small bowl and whisk until well combined. Cover, and set aside.
Assembling:
- Line a 25-28cm springform pan with baking paper.
- Dust a large section of bench (or other work surface) with plenty of flour. Once the dough has risen, turn it out onto the bench, and gently press it into a small rectangle. Dust the surface of the dough with flour, then flip it, and ensure the other side is coated with flour as well.
- Using a rolling pin, roll the dough out into a large rectangle- approximately 40cm wide and 30 cm long. It’s important that while you are doing this, you continue to dust the surface of the dough, to prevent it from sticking.
- Once you have your big rectangle, carefully spread the date puree over it in an even layer. It should reach to within 1/2 a centimeter of the edges. (See photo here for visual aid.)
- Gently roll the dough up, lengthways, into one long log-shaped roll (see photo here). If the dough is sticking to the work surface while you’re trying to roll it, sprinkle some extra flour along bench, next to the dough. Gently press the flour in and under the sticky section, in order to loosen it, then continue rolling.
- Ensure that the roll is seem-side down. Then, using a sharp knife, score the log into 10 evenly-sized sections. I use a tape measure or ruler for this, and score once every 4 cm (see photo here). Then, using a sharp knife, cut down through each score so that you have 10 separate pieces. Take each piece and gently shape it into a round, then place them (swirls facing upwards) in the springform pan (7 around the edge in a circle, and 3 in the middle). Leave a little space between each one.
- Cover the baking pan with a damp towel, and leave to rise in a warm, dry place for an additional 40 minutes.
- Preheat the oven to 180°C. Once the buns have finished their second rise, remove the towel, and cover the top of the pan with foil or baking paper. Place in the oven for 15 minutes. After 15 minutes, remove the cover, and bake for an additional 15 minutes.
- Once cooked, remove the cinnamon buns from the oven and set aside to cool for 15 minutes.
- Once you’re ready to serve, take the buns out of the pan, but do not separate them (they should be baked together, as they are in this photo). Place on a large plate or board, and drizzle the glaze over the top. Alternatively, you can keep the glaze separate, and top individual buns with 2 teaspoons of glaze when serving.
Prepared cinnamon buns should be wrapped in a towel and kept unrefrigerated (for up to 48 hours). Warm through before serving. You can also freeze any extra buns in a ziploc bag for up to 2 weeks. Thaw completely and warm through before serving.
